Brooke's Column of Leaves Hat
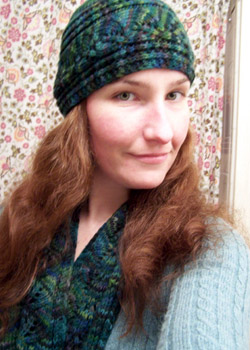
Me modeling the hat with the matching scarf.

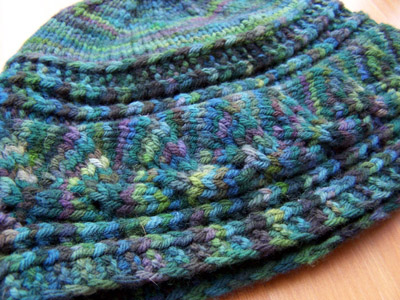
A close-up of the crown.
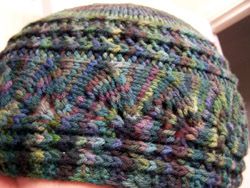
A close-up of the leaf detail.
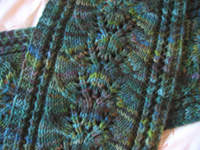 |
This is the matching hat to my Column of Leaves Scarf (seen at left). It utilizes the same lacy column of leaves motif around the band, only it's just half of the original "column" (and the best part is that it's the half without the p2tog tbl that is in the scarf! That is not a fun stitch to make). Click on any photo to see it larger. |
Gallery of Hats
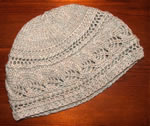 By gardengirl (Ravelry) |
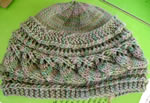 By Rachel |
|
 By Dipsy |
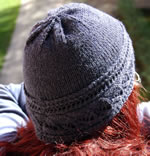
|
|
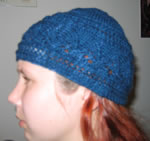
|
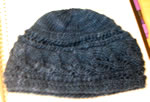 By Woolology |
The Pattern
Printer-friendly pattern (PDF)
Abbreviations:
SKP = Sl 1, k1, psso (psso = pass slipped stitch over knit stitch)
K2tog = knit two stitches together
P2tog = purl two stitches together
To make the band:
CO 28
Purl one row (WS)
Begin pattern:
Row 1 (RS):
Sl 1, k2, SKP, yo, k2, p2, k7, k2tog, yo, k1, yo, p2, SKP, yo, k4, sl 1
Row 2 (WS):
P1, k2, p2tog, yo, p2, k2, p3, p2tog, p6, k2, p2tog, yo, p2, k2, p1
Row 3 (RS):
Sl 1, k2, SKP, yo, k2, p2, k5, k2tog, k1, (yo, k1) twice, p2, SKP, yo, k4, sl 1
Row 4 (WS):
P1, k2, p2tog, yo, p2, k2, p5, p2tog, p4, k2, p2tog, yo, p2, k2, p1
Row 5 (RS):
Sl 1, k2, SKP, yo, k2, p2, k3, k2tog, k2, yo, k1, yo, k2, p2, SKP, yo, k4, sl 1
Row 6 (WS):
P1, k2, p2tog, yo, p2, k2, p7, p2tog, p2, k2, p2tog, yo, p2, k2, p1
Row 7 (RS):
Sl 1, k2, SKP, yo, k2, p2, k1, k2tog, k3, yo, k1, yo, k3, p2, SKP, yo, k4, sl 1
Row 8 (WS):
P1, k2, p2tog, yo, p2, k2, p9, p2tog, k2, p2tog, yo, p2, k2, p1
Repeat these 8 rows 16 times. [This should make the band long enough to wrap comfortably around an average adult head (about 21-22 inches). You can of course make it longer or smaller to fit your head, then you would need to adjust the number of stitches you pick up to form the crown.] Then bind off. At this point, it is a good idea to block the band before starting on the crown.
Join the edges of the band using your preferred method. (You can also choose to start the band with a provisional cast on then graft the edges - this will result in the most finished look.)
To make the crown:
With 4 or 5 double pointed needles, and with the band turned inside out*, pick up 66 stitches along one edge of the band through the slipped stitches (dividing the number of stitches evenly among the needles). (* This will result in the slipped stitches lying toward the right side of the hat, resulting in a nice raised row of stitches separating the band from the crown.)
Carefully turn the band right-side out. Using a stitch marker, mark your beginning point and knit around for 10 rows.
Crown decrease:
Place a stitch marker to mark the beginning of the decreases.
k4, k2tog - repeat 11 times - you will have 55 stitches
Knit one regular round
k3, k2tog - repeat 11 times - you will have 44 stitches
Knit one regular round
k2, k2tog - repeat 11 times - you will have 33 stitches
Knit one regular round
k1, k2tog - repeat 11 times - you will have 22 stitches
Knit one regular round
k2tog - repeat 11 times - you will have 11 stitches
k2tog - repeat 5 times - you will have 6 stitches left on the needles.
Place 3 stitches each on 2 needles. Cut the yarn leaving about 12 inches. Thread this through a yarn needle and thread through the remaining stitches and pull tight to close the hole. On the inside of the hat, weave in ends well.
Weave in any other remaining ends.
Contact me!